DIY NATURAL HOMEMADE LIP BALM IN 5 MINUTES
This homemade lip balm is SO EASY to make. Seriously – you can make it in 5 minutes or less – no word of a lie! It has only three ingredients, all of which are completely natural. I love that I don’t have to worry about added acids and alcohol and the other chemicals that they add into store bought lip balms. Why would I want alcohol on my lips to dry them out?! Doesn’t that go against what a lip moisturizer is actually for?

Are you ready to cue the violins? I have sensitive skin. I know. Me and everyone else, right? My lips seem to have it the worst. I am allergic to pretty much 90% of the lip balms out there.
I’ve been pretty excited to try making my own lip balm. I was a little nervous that it would be complicated, but I managed to find the easiest recipe possible. This was my first time making homemade lip balm so I didn’t want to be messing with fancy beauty supplies that I’ve never heard of or used before. So I promise, you can be a total beginner and you’ll still be able to make this, no problem. It’s crazy simple!
I got all of my supplies from a local soap making supply store because I didn’t want to wait for them to ship from an online store. Just Google “Soap making supplies in YourTown” and I bet you can find something local too. I picked them up last week.
Easy Homemade Lip Balm
You’ll need:
- Yellow Beeswax Beads
- Coconut Oil
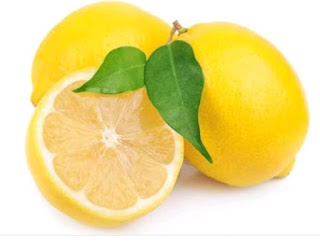
- Essential Oils (I used Lemon and Peppermint)
- Empty Lip Balm Tubes
- Small glass bowl
- A small syringe or eye dropper

I used my Young Living Essential oils and they ended up smelling wonderful!
(Adding a little color to it gives it an added beauty, that's for commercial purposes, but it's not really necessary)
You can double or triple this recipe if you want, but I didn’t want to be left with dozens of lip balms, so I made a small amount. It was enough for 5 tubes of each flavour, so 10 tubes total. I probably could have gotten 6 tubes from each recipe but I spilled a bit. Oops.
Add 1 Tablespoon of the beeswax pellets into a small glass dish. You can buy solid beeswax (as long as it’s cosmetic grade) if you want, but then you have to figure out how to grate it and melt it down, so the pellets seem so much easier.
Microwave the pellets on high power for about 45 seconds. If you have a strong microwave, start with 30 seconds before checking on it.
Then add 1 Tablespoon of the coconut oil. This stuff is a little more refined than what you’d buy in the grocery store. Mine didn’t even have a smell to it.
Return it to the microwave for another 45 seconds or so.
See how everything started to melt down? I microwaved it for 45 seconds one last time and it was completely melted. So three times 45 seconds on high power was all it took for me and my microwave.
Next add in the essential oils and mix it well with a small fork or baby spoon. You might want to return it to the microwave after this for another 15 seconds, just to keep it warm and liquid.
I used a leftover sterilized syringe from one of my baby Advil boxes to fill the little tubes. There’s no way I’m steady enough to pour into such a small opening freehanded. The syringe worked really well.
It cools and solidifies fairly quickly, so if you notice it clumping up as you fill the tubes, put the glass bowl back in the microwave for 15 seconds to heat it up again.
Fill the tubes as full as you can without overflowing. By the time I finished filling the 5 containers, the first one had already solidified. I love that there was no waiting required. I mean, you might want to give them 5 minutes to harden, just in case, but I was too excited, and tested one out right away.


Comments
Post a Comment